Lesson 1 · Grade 7 · 40 minutes
Backpack Nameplate
Make a bag tag with a readable name, a clean hanging hole, and a design of your own.
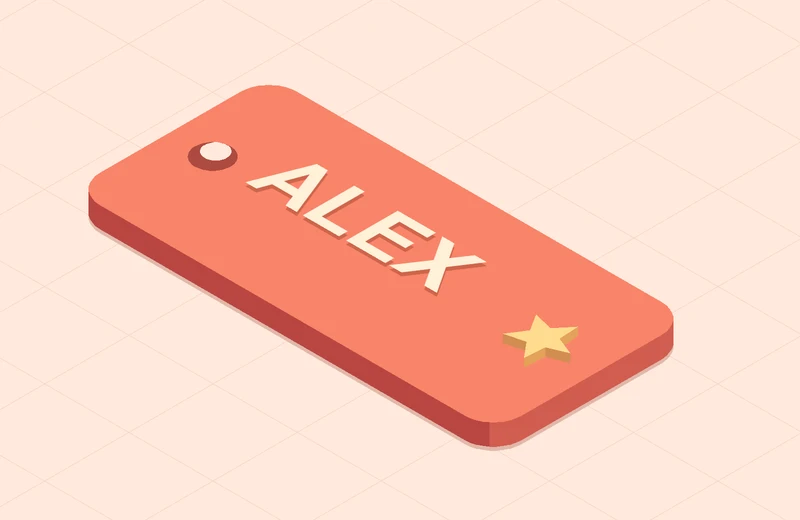
What you’ll make
A single connected model with raised text, a flat base, and a hole that goes all the way through.
You’ll need
Tinkercad, pencil, and sketch paper
Teacher preparation
Have students sign in to Tinkercad. Open a blank 3D design and have a finished tag ready to show from the top and side.
0–5 minPlan
Design a tag you can actually use
- Look at the example. Find the base, the name, and the hole. What makes the name easy to read? Where should a key ring go?
- Sketch a tag with a short English name or nickname. Mark the hole first, then leave room for one small symbol or decoration.
5–10 minModel
Get oriented and size the base
- Open a new 3D Design. Use the ViewCube to switch between Top and Front. Right-drag to orbit and scroll to zoom.
- Drag in a Box and enter 60 × 28 × 3 mm. Set Radius to 1 and Steps to 10 for rounded corners. Recheck all three dimensions.
10–16 minModel
Cut the hanging hole
- Add a Cylinder, set it to Hole, and make it 5 × 5 × 6 mm. Center it across the short edge of the tag, with its center about 5 mm from the left end.
- Select both shapes and choose Group (Ctrl+G on Windows, Command+G on Mac). Orbit to check that the hole passes through. The target clearance to the left edge is about 2.5 mm.
16–24 minModel
Raise the name
- Add Text, enter your name, and choose a clear font. Fit it within the usable area and set the text thickness to 1.5 mm.
- Set the bottom of the text to Z = 2.8 mm so it overlaps the 3 mm base by 0.2 mm. If you use W to set a workplane on the top and D to drop the text, lower it by 0.2 mm and use W on the blue grid to restore the ground plane.
- Check the model from the side before grouping. Every letter needs to touch and overlap the base.
24–30 minBuild
Add a detail that fits
- Use flat cylinders or small boxes to make a face or symbol. Duplicate a shape with Ctrl+D or Command+D. A small library shape also works.
- Fit the detail alongside the name. Keep the hole clear, make sure each piece overlaps the base, then group the finished tag.
30–36 minTest
Check it with a partner
- Read the name at a glance. Look through the hole from the top, then use the side view to check for floating pieces.
- Turn the tag over and check that the bottom is flat. Give your partner one specific improvement and make the most important fix.
36–40 minSubmit
Save, export, and share
- Save your Tinkercad design. Select the tag, choose Export, and download an STL of the selected shapes. Use your teacher’s naming format.
- Show a partner one design choice. After printing, check that a key ring fits and that the name is easy to read.