Lesson 3 · Grade 7 · 40 minutes
Pocket Tilt Maze
Build walls around a playable route, then test how a ball moves when the maze tilts.
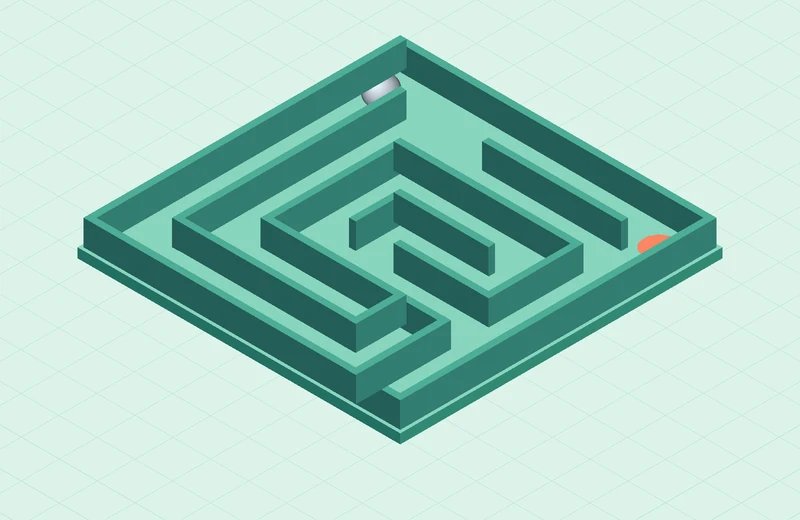
What you’ll make
A connected, open-top maze with one continuous route, labeled endpoints, and room for an 8 mm ball.
You’ll need
Tinkercad, pencil, and 7 × 7 grid paper
Teacher preparation
Open the web maze and prepare a Sim Lab copy with an independent ball. For a 40-minute class, have a Tinkercad starter with the base and frame available for students who need it.
0–4 minPlan
Play a round and sketch a route
- Try the web maze or watch its demo. Look for a corner where a smaller tilt helps you steer.
- On a 7 × 7 grid, mark Start and Finish. Draw one continuous route between them, then add walls. One short dead end is enough for your first version.
4–12 minModel
Build the base and frame
- Set a Box to 102 × 102 × 3 mm at Z = 0. Put the Ruler at the lower-left corner of the base and use endpoint measurements.
- Use two 100 × 2 × 8 mm horizontal walls at (1, 1) and (1, 99). Use two 2 × 100 × 8 mm vertical walls at (1, 1) and (99, 1). All positions are the lower-left corners.
- Set the bottom of every wall to Z = 2.8 mm. This leaves a 1 mm border, overlaps the base by 0.2 mm, and connects the walls at the corners.
12–22 minBuild
Use repeated walls to shape the route
- Make a 16 × 2 × 8 mm wall segment at Z = 2.8 mm. Duplicate it along a grid line in 14 mm steps. The 2 mm overlap connects adjoining pieces. Rotate 90° in the ground plane for vertical walls.
- The grid lines are at 2, 16, 30, 44, 58, 72, 86, and 100 mm on each axis. Wall centers go on these lines. The gaps between parallel walls on adjacent lines are 12 mm wide.
- Use a few straight runs to create the main route first. Add raised Start and Finish marks on the frame where they leave the channel clear.
22–28 minTest
Check the route with a gauge ball
- Make a separate 8 × 8 × 8 mm Sphere and place its bottom at Z = 3 mm. Move it by hand through a tight gap, a turn, and the finish to check clearance.
- Have a partner trace the route from above and inspect one wall joint from the side. Fix a narrow turn, a gap between walls, or a wall that floats above the base.
28–32 minDemonstrate
Watch gravity and collisions in Sim Lab
- Teacher demo. Open the prepared experiment copy in Sim Lab. Bundle the maze body, then set it to Static. Select the ball separately and set it to Dynamic with Steel as its material.
- Lift the body above the ground before tilting it, and place the ball above the tray. Press Play and predict where the ball will roll. Use Reset before changing the tilt.
32–40 minSubmit
Finish, export, and plan the print test
- Return to the flat print design. Remove the separate gauge ball, then group the base, walls, and attached marks. Keep the editable design and export the maze body as an STL.
- Explain one wall choice to a partner. After printing, test the route with an 8 mm ball and check for rough spots, blocked turns, and gaps the screen model may have missed.